Basics
Delivery to a cloud storage provider object storage can be configured as needed which will enabled documents (PDFs or FHIR bundles) to be pushed to a cloud storage location of your choosing.File Delivery Location Template
Customers are able to decide the location within their cloud storage where the files are delivered to using a configurable template which Connective Health maintains on their behalf. A reasonable default for the template would beincoming_files/[yyyy]/[MM]/[dd]/[correlationId]_[mrn]_[patientLastName]_[documentType].[ext]
See the below table for all the dynamic variables which are available in the template. Work with your account manager
to decide what this configuration should be.
Available Dynamic Values
AWS S3
Customer Setup
We connect to AWS S3 using a federated web identity authz model. This allows for security without the need to exchange static secrets.- Create (or identify) an S3 bucket which should be used for Connective Health to push documents to
- Our recommendation is to create a new bucket for this specific purpose to prevent accidental data leakage or other unexpected problems
- Create a new Role under the IAM section of your AWS Console
- When building the role, choose Custom trust policy and edit the JSON of the policy
- Set the policy to the below JSON, Connective Health will provide you with the appropriate Google Account
subvalue based on the environment (staging or production)
- Set the policy to the below JSON, Connective Health will provide you with the appropriate Google Account

- Choose Next
- Continue with the wizard, skipping the adding of permissions, we will do that later
- The name can be anything you want, for example ch-assume-role-policy
- After creating the role, click on it
- Click the Add permissions dropdown and choose Create inline policy
- Select JSON
- The permissions should provide these permissions (at least):
- s3:PutObject
- s3:GetObject
- s3:ListBucket
- s3:GetBucketLocation
- The permissions should provide these permissions (at least):
- Make sure to populate the resources array with the S3 bucket and objects
- Here is a complete example:
Connective Health S3 Setup
When you are finished with your configuration, please notify Connective Health of the following information:- Your chosen file delivery location template, which will dictate the exact path Connective Health writes files to within your S3 bucket
- The name of your S3 bucket — we will need a staging/test bucket as well as a production bucket
- The role’s ARN value. This can be found on the role page, under the summary section
Azure Blob Storage
Customer Setup
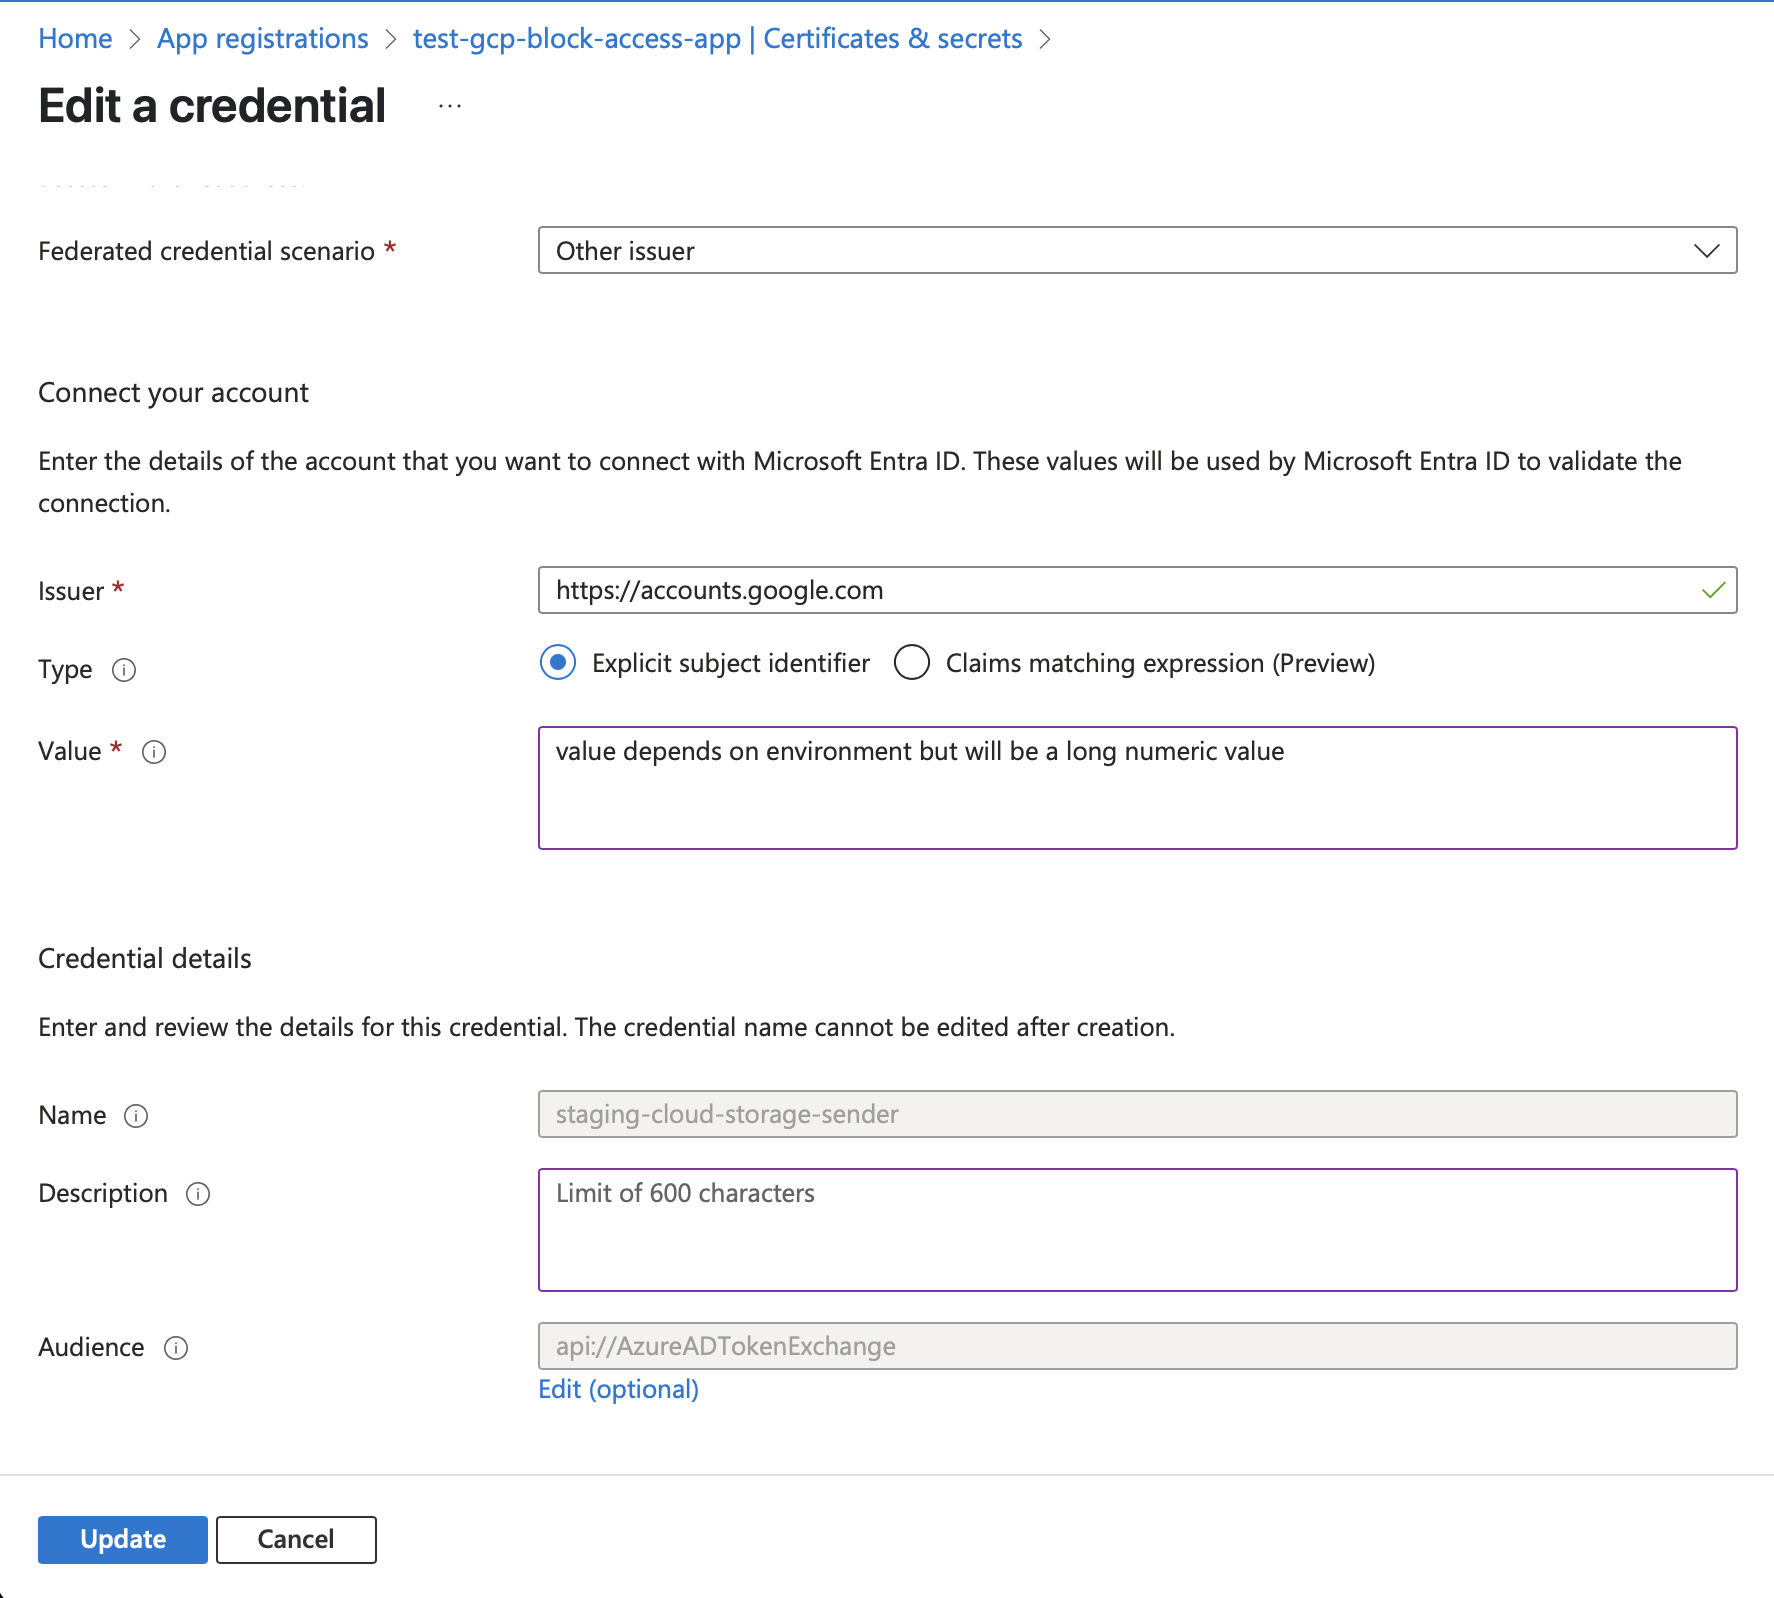
We connect to Azure Blob Storage using a federated identity credential model. This allows for security without the need to exchange static secrets.- Create an App registration in Azure Active Directory
- This is needed to get a client ID
- Under the app registration, create a new federated credential
- Connective Health will provide you with the appropriate Google Account subject identifier value based on the environment (staging or production)
-
Create a Storage account in Azure
- Our recommendation is to create a new storage account for this specific purpose to prevent accidental data leakage or other unexpected problems
- Under this storage account, add the app registration from the previous step with the proper access role
- You can choose either a standard role like “Storage Blob Data Contributor” or create a custom role based on your security requirements
-
Create a Storage container under the storage account
- This container will be used to store the documents that Connective Health pushes to your Azure Blob Storage
Connective Health Azure Setup
When you are finished with your configuration, please notify Connective Health of the following information:- Your chosen file delivery location template, which will dictate the exact path Connective Health writes files to within your Azure storage container
- The app registration Application (client) ID
- The app registration Directory (tenant) ID
- The storage account’s blob service endpoint URL
- The storage account’s container name